CUCC Expedition Handbook - Your phone
Cave survey software - using a phone
Phones
See Your Phone on Expo for stuff everyone should do to set up their phone for expo: photos, safety, etc.
See Locating entrances by GPS in the survey handbook section.
Your Android phone GPS apps
Everyone has a phone pretty much, and everyone should have GPS enabled for safety. See the expo GPS configuration pages.
There are several cave survey apps which run on a phone. We don't yet have a well documented way of using these
with the expo survey data workflow.
- OsmAnd - a GPS app.
- GPSessentials - another GPS app.
- Ape@Map - another GPS app, compatible with Kompass commerical map sand used by Austrian cavers
- TopoDroid makes cave surveys with the DistoX.
- Cave3D is a Therion 3D viewer.
- ThManager organizes single surveys, exported by TopoDroid, into Therion projects encoded by Therion "thconfig" files.
You can also use a phone to upload files and manage version control on the server. This is not the place to start, but if you are already doing this on your own laptop then these can be useful:
- Termius - command line to create a registratkey for your phone, to ssh (and mosh) login to the expo server. To get sftp you have to buy it.
- andftp FTP app - needs an ssh key installed on your phone
- FTP using Cx_File_Explorer (this is probably out of date)
Bulk Data Phone: Using an FTP app
If you want to do it yourself and the USB cable trick does not work then you will need to install a file manager and FTP app. Currently (on Expo 2019) the best seems to be the free andftp app. Assuming you can find where your phone camera has put the photo files on your phone, you can use your phone to upload photos directly to the /uploads/ folder on the expo server. However renaming them to something sensible and putting them in your own /YourName/ folder (see above for file naming guidelines) is fiddly on a phone.
To use the FTP app you will need: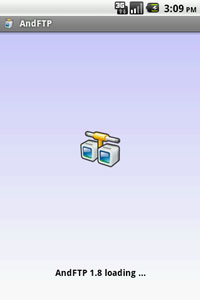
- The hostname of the server: expo.survex.com
- the username: expo
- the password: (the usual cavey:beery password which you can get verbally from another expoer)
- the target folder: /uploads/, or it may appear as /expofiles/uploads/
- the port number: 21 (if you leave this blank it will probably work)
But none of this will work until you have also done the key-pair setup procedure. On a phone this means that you will also need to install a terminal (command line) app. See Android instructions.
- Install the andftp app onto your Android phone using the Google Play Store and allow it to access your files and photos on your phone (just click on the popup to do this).
- Click on the icon that looks like a "plus" synbol in a circle
- This opens a window with 3 tabs: General, Advanced and Sync
- On the General tab, type in the hostname, username and password as listed above.
- Also tick the checkbox "Enable resume support"
- Click OK to the two popups that appear
- You will now see an icon of a networked file folder (light blue) with the label "expo.survex.com". Click on it.
- Wait a while as it loads...
- Keep waiting. Various messages will scroll by at the bottom of the screen in tiny font.
- Keep waiting..
- The tiny text at the bottom will say "226 Transfer complete" and the main part of the window will show a listing of the files in the /uploads/ folder on the server.
- Now click on the little icon of a phone near the middle of the top row of icons.
- This will show a list of folders on your phone. Initially it will show "alt_autocycle, Android and DCIM".
- Click on ""DCIM", it will show a folder "Camera", click on that
- Now you can see a list of all your photo files by name and with the size shown on the right. Typically they will be 1.3MB or so in size.
- Before you upload, you need to create your own folder.
- Now click on the icon of a little cloud near the middle of the icon bar. This will show the files on the server.
- Now you need to create a folder /YourName/ and move those files into it. Click on the 3-dots icon on the right-hand end of the icon bar.
- Select the Create Folder option.
- A popup appears and you type in YourName. The folder is created.
- Click on the /YourName/ folder. This will makeyour folder the destination for uploaded files.
- Now click on the little icon of a phone near the middle of the top row of icons.
- This shows you the list of your photo files you saw before.
- Clicking on each photo filename will cause a green tick to appear on the left. This is selecting files for FTP upload.
- Now click on the "upload icon" on the top row: it looks like a short horizontal line with an up-arrow on it.
- A popup will appear asking if you wish to proceed. Click OK.
- The upload happens and you can see progress bars for each file.
- When it finishes it presents a popup with an OK button. Click on it.
- Now you will see the files you have just uploaded. And they will be in your folder. Success.
- Now you need to rename the files to something descriptive. This is very time-consuming on a phone.
- Click on one file to give it a green tick. Then select the 3-dot icon and then select the "Rename" option in the drop-down menu.
- Of course you will have earlier noted down the names of all your photos and made a note of their contents (which you see using the phone's Gallery app) so that you can do the renaming intelligently.
Return to Setting up a Chromebook
Return to Setting up a basic laptop
Return to Setting up a survey laptop
Your phone on expo - Do not select the "high accuracy" location setting on your phone
GPS essentials on the plateau - Safety information
Photo GPS - Is unreliable unless you follow procedure
Locating entrances by GPS - from the survey handbook section