CUCC Expo Surveying Handbook
Surface surveys
Surface surveying is different
 The main difference with a surface survey is that you can see, and are not
constrained by passage walls. The lack of walls may mean that all survey
points are on the floor, which can be a pain. It is useful to use one or two
"survey staffs", which may be as simple as a stick shoved in a grike, or a
photographic tripod which is handy. Make sure not to place a compass too near
anything made of steel! An aluminium pole (old tent pole, ski stick or any
odd bit of tube or angle) is light and effective. Making it a useful length
(eg. 1m or 1.5m) means it can double as a ruler for measuring features.
The main difference with a surface survey is that you can see, and are not
constrained by passage walls. The lack of walls may mean that all survey
points are on the floor, which can be a pain. It is useful to use one or two
"survey staffs", which may be as simple as a stick shoved in a grike, or a
photographic tripod which is handy. Make sure not to place a compass too near
anything made of steel! An aluminium pole (old tent pole, ski stick or any
odd bit of tube or angle) is light and effective. Making it a useful length
(eg. 1m or 1.5m) means it can double as a ruler for measuring features.
Surface survey legs tend to be longer than underground ones, so errors from
poor compass/clino/distoX angle readings are bigger. In good light you may find it easier
or get more consistent results by sighting the compass with one eye
rather than two. Remember to do this consistently, and use the same method
when doing your calibration. For better accuracy, you should really keep the
survey legs short (6m gives a compass/clino error comparable with a 5cm
station position error). This makes the survey take much longer, and maybe
more prone to recording errors, so a good compromise is to keep legs down to
15m or less, which also makes sketching a little easier.
Using a distoX above ground does make it hard to see the laser spot in bright
sunlight of course, which limits the length of legs (except at dusk).
Don't neglect sketching! Cold, exhaustion and call-out times should
not be such a restriction on surface surveys, so don't do a rush job (it is
best not to do surface surveys when the weather is awful:-). A good
surface sketch makes caves easier to find, possibly saving future cavers from
repeating your bearings to find the entrance. Eventually such sketches will
build to a map of the area, showing which bits have really been looked at.
It
is conventional to survey to the cave marker tag, where there is one (and you
could always drill a spit for one, and survey to it). Failing that, the centre
of the painted number or middle of the "+" sign, or the first bolt of the
rigging (remember that we are no longer allowed to paint marks on the plateau
surface). Make sure that you record what is used, and its height above/below
the "surface".
If you do run out of time, make sure that your final survey point can
readily be found again, for example a drilled hole in a prominent boulder
(take a photo). Consider going back a few legs if it will give you an
easier to find end point - better to lose one or two legs than have to redo
the whole survey!
Entrances and holes
All features of speleological interest should have their position recorded exactly.
These days (2025) a medium-average GPS location (3 minutes: i.e. 1,000+ GPS "events" inside your device) is fine (see GPS for entrances) in most parts of our caving area.
(This is not "accurate": it will be perhaps 5m off if you measure the same spot the next day when the ionosphere is in a different mood, and any altitude you get will be absolutely useless.)
This usually means using a handheld GPS device rather than a phone unless you have a specifically accurate GPS app (e.g. OSMand) which provides both an averaging function and does not assume that you are a cyclist or fell-runner (most Garmin devices in 2025).
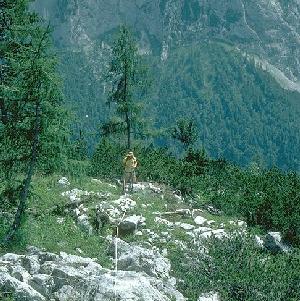
If you are close to a big cliff, or almost inside an overhang, then an averaged-GPS will apparently be good (~ 2m accuracy)
for latitude/longitude but appallingly misleading for altitude. In some parts of our area, such as the steep cliffs of
the Weisse Wand near Schnellzughöhle (as seen in the photo at the top of this page),
altitude is important for route-finding so GPS becomes surprisingly much less useful for re-finding locations. Before you use
GPS you really should read GPS for entrances.
There is more about GPS altitudes in Olaf's article on GPS in Austria.
Without GPS we need an old-fashioned survey location using fixed points
with a minimum
of two bearings on fixed landmarks (see taking bearings
page for how to do this and for pictures of the various peaks we used to use). This is now a forgotten skill.
Anything
which gets a number (e.g. 2018-ad-01) should eventually be linked into an existing surface
survey. The number (on a metal tag) will be attached to the cave
entrance with a bolt, so it is useful to drill a hole for this (and place the
spit if possible) early on, so you can use that point as the start of the
underground or surface surveys. Always fix new stuff with a
GPS (use waypoint averaging) as even if this is not full survey-quality it does prevent things getting lost.
There is a separate manual page for using GPS for entrances.
Finding a starting point
If your new cave is near a well-documented one, then a short connecting
survey from one to the other is straightforward. The point on the cave
should always be accessible without caving gear. Usually this will be the
cave marker tag (or the spit you have placed for one, or hole drilled for
it). If there is just a hole, it is as well to mark it with a bit of paint
so it can be found again. Failing these, a well-documented spot which can
be found again is essential - the first bolt of the rigging or part of a
painted number.
The surface is now becoming laced with a network of surface surveys of
different vintages and qualities. As these build up, good sketching means
a useful scale map can be drawn, which in turn means you can look to see
where the nearest existing fixed points are to your cave. The best fixed
points are the ones fixed by accurate (laser theodolite) survey by the
Austrians, commonly known as "laser points". Next
best are surface surveys taking a short route from these points.