A walk through tunnel - Areas
From Fs_wiki
Now that you have completely enclosed the cave passages with cave walls and invisible lines, you can see them greyed out, so the passages are readily visible on the image. Tunnel recognizes areas: each sequence of connected paths that form a closed loop defines an area. The sequence of paths is the contour of the area.
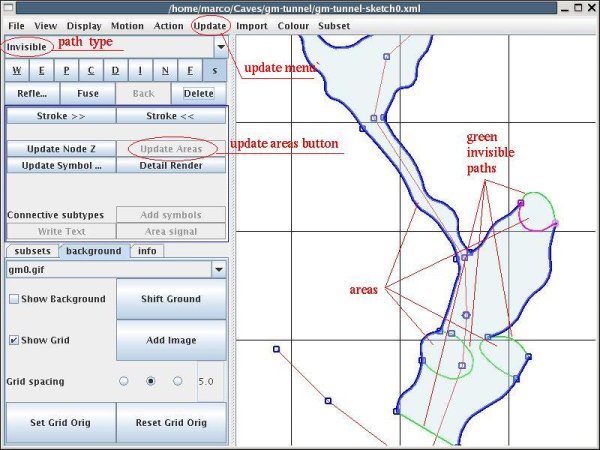
Areas are not saved with the data, they must be recalculated when you load the sketch from the xml file, or when you make changes to the drwaing. To recompute and display the areas click on the button "Update Areas" (or the menu "Update | Update areas"). The picture below shows the sketch with the areas lightly greyed.
Clicking on the "Update Areas" button you effectively invoke the areas calculation algorithm. This algorithm is rather simple and you should understand it in order to work effectively with areas. Now I report the algorithm as explained by J. Todd: The algorithm to generate the areas is simple: Follow a path till it hits the first node. If there are other paths that connect to that node, choose the first path on the left (clockwise), and follow it until you reach another node. If there are no paths connecting to that node, go back on the same path in the opposite direction. Repeat until you reach the starting path, going in the same direction. This series of paths defines one area. Continue until all areas are accounted for.
This algorithm explains why it is crucial that paths must be connected correctly to one onother. Also remember that the centerline and connective paths of paths are not used by the areas calculation algorithm.
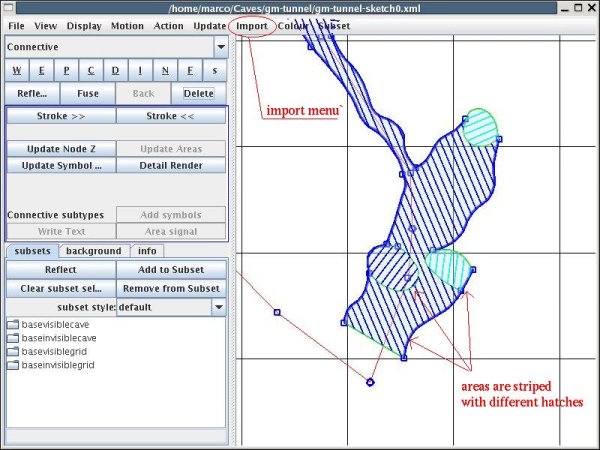
You can also display the areas hatched (as well as greyed). This way it is easier to distinguish them from one another. This feature will come useful when we draw more complicated caves. For the moment just play with it. Click on the menu "Import | Striped areas". The picture below shows the sketch displayed with hatched areas.


