Printing
From Fs_wiki
Contents |
Printing Cave surveys
This is one of the hard parts. Java printing is awful. A good alternative is to output SVG that can be imported into an editing program for generating your posters. But you might not know what SVG is, or have an editing program which supports it. The alternative is to export bitmap image files for printing, which has worked well for me.
Printing in Tunnel has had a complete overhaul in early 2007, so it is no longer a case of exporting the entire sketch as a bitmap. The new frame based printing is a little more complicated to get working, but provides great flexibility to produce multiple presentations from a single sketch. Here is a guide to how it works.
Frame Based Printing
The power of frame based printing is that you create a separate presentation sketch to generate your survey for printing, and this references your original survey sketch. The advantage to this approach is that you can make changes to your original sketch, and they will be seen in any presentation sketches you have created. So you no longer end up maintaining multiple sketches which each show your survey in a different way.
Here we will walk through an example based on the inlet7 sample survey which can be downloaded with Tunnel. So first open the inlet7 project folder in Tunnel.
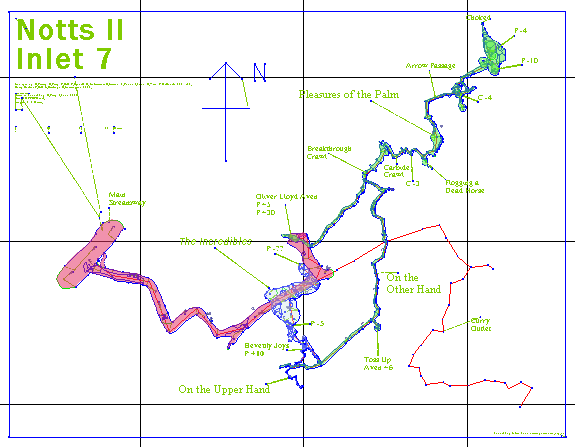
We will use the sketch9 for this walk through, but you can use any survey sketch of your own if you want. First we need to remove some stuff from the inlet7 sketch9 so we can demonstrate the example. Here is how the sketch looks before we start.
|
Original Inlet7 sketch 9
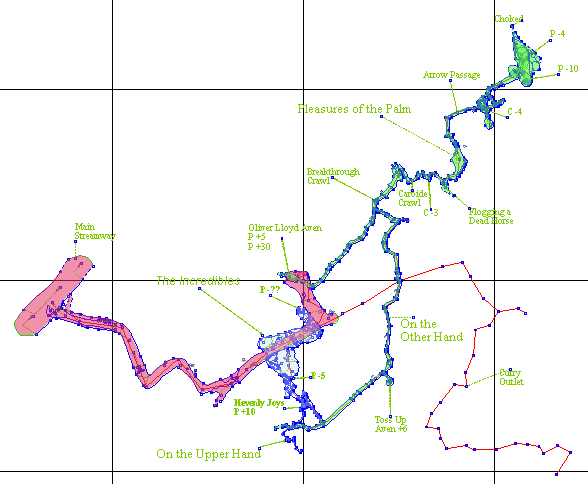
We are going to remove the frame from around it and the title box, north arrow and scale bar. This is because we want to demonstrate how to present these in a different way, so we need a sketch of just the cave passages to start with. Delete these and save the sketch. It should look like this.
|
Sketch showing only the cave passages
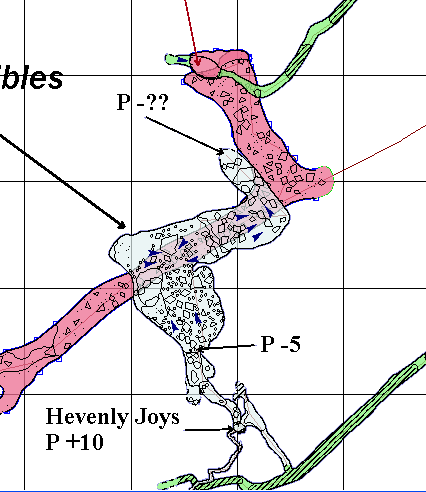
This sketch includes some areas which we might want to show at a larger scale. For our example we will look at the aven in more detail.
|
Using frames we can include multiple views of the cave in the same sketch.
- Create a new empty sketch. We will import views of our cave passage sketch into this new sketch using frames.
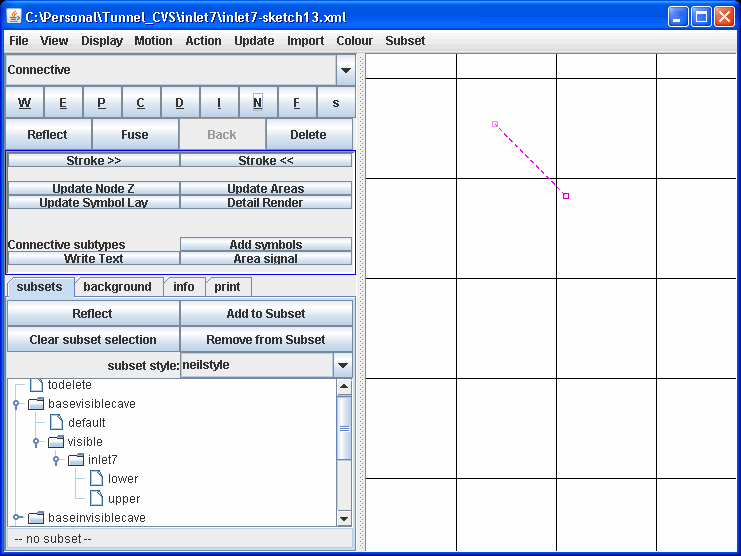
- In the new sketch draw a single connective line sloping down to the right.
|
- With the connective line selected, click on the 'Area signal' button and set the area signal type to 'frame'.
- With the line still selected, open the 'Import' menu and select 'Import paper > Make A3'. This will create a frame in the sketch which represents the area of an A3 sheet of paper. Select 'View > Max' from the menu to show the entire frame in the sketch window.
- Right-click in the frame to de-select the connective line, and click the 'Update Areas' button. The frame should be shaded pale blue.
- Switch back to the Mainbox window and select the sketch we want to import into the frame (just click once to select it, not to open it).
- Return to the sketch window, and make sure the connective line in our frame is selected again. It should look something like this.
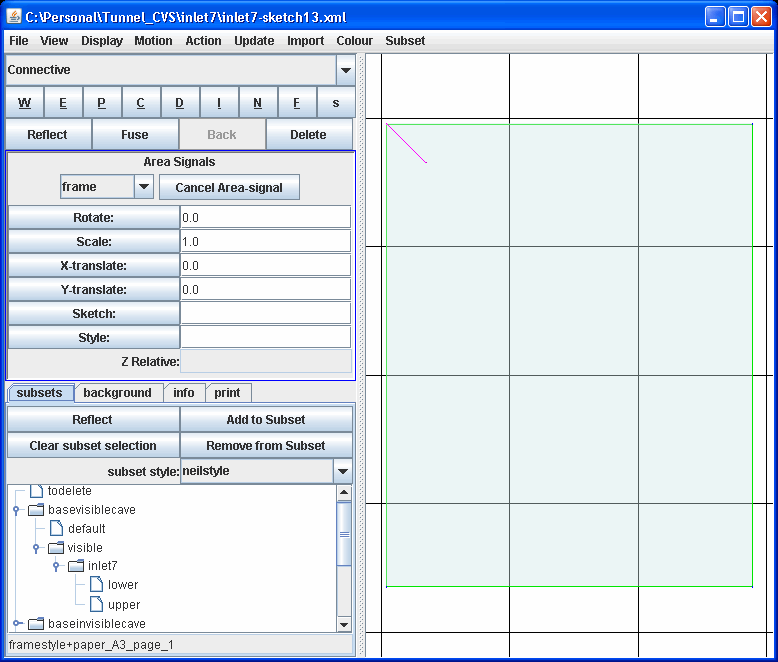
|
- Click on the Sketch button, followed by the style button. The boxes to the right of the buttons should be filled in with the names of the sketch we want to reference, and the display style.
- Next click in turn the Scale, X-translate and Y-translate buttons. You should now see your sketch centred and scaled to fit in the frame. You can now adjust the scale and translation to move and size the sketch in the frame. In my example I reduced the scale from the default of 511 to the smaller value of 600 so my sketch did not touch the edges of the page.
- Deselect everything and click the 'Detail Render' button. It should look something like this.
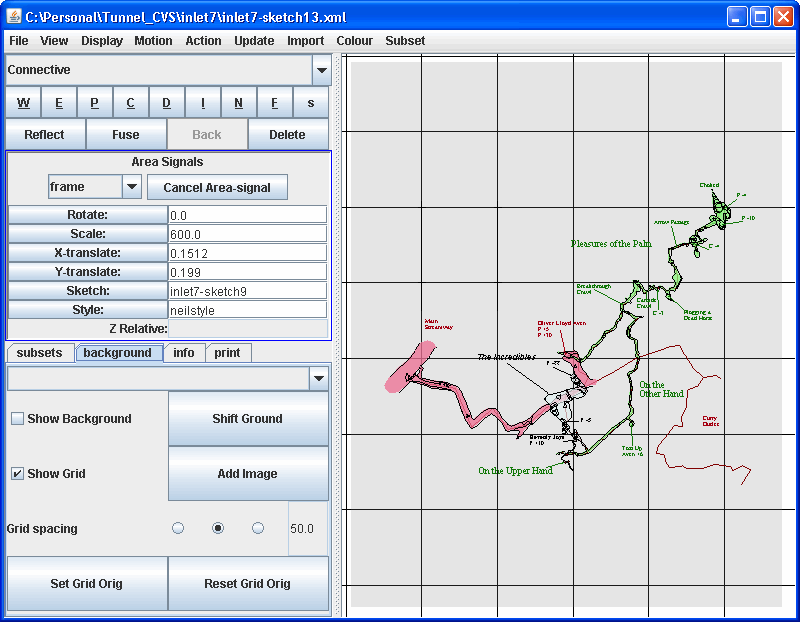
|
Next we will bring a second view of the same survey into our presentation sketch.
- Draw a rectangle in a blank area of the page frame using detail lines.
- Add a connective line to the rectangle and set the area signal to 'Frame'.
- Update areas again, so Tunnel recognises the new frame, and then click on the sketch, style, scale and translate buttons in turn to bring in a second copy of the sketch.
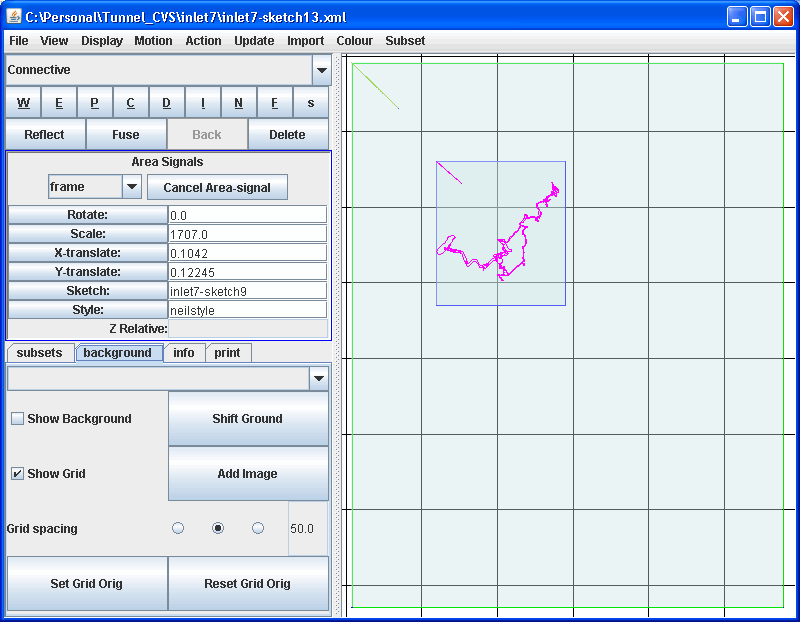
|
Initially the sketch will be scaled to fit the page frame.
- Select the connective line for the new frame again.
- Enter a new value in the scale box (in our example a scale of 400 works well).
- Adjust the values in the X-translate and Y-translate boxes to centre the area of the sketch we want to show in the frame.
Render the sketch again and it should look something like this:
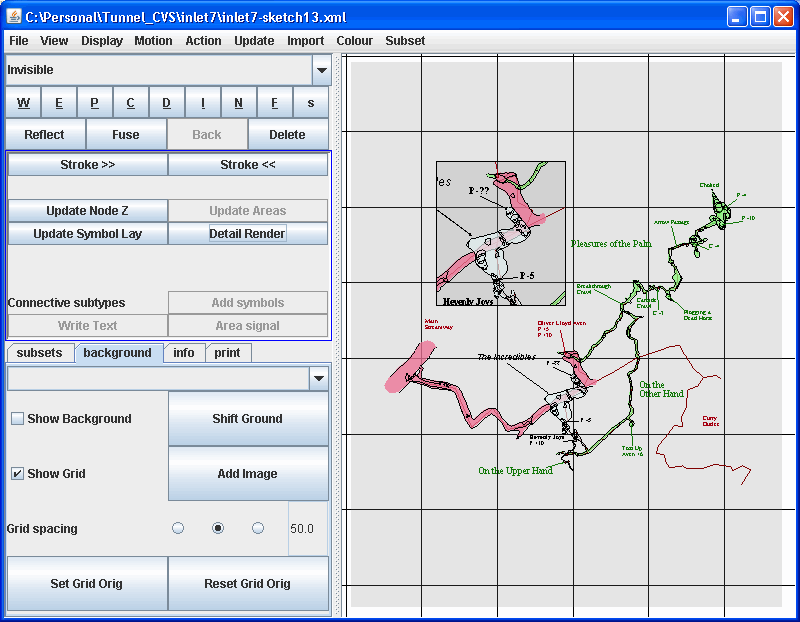
|
Finally we can add the title frame and north arrow back in. We might not want these in the same place on every sketch we print for this cave, and in some cases we might not want to include them at all. Using frames we can import these details from a separate sketch so that the main cave passages sketch can be reused in other presentations.
- Create a new empty sketch and draw a rectangle.
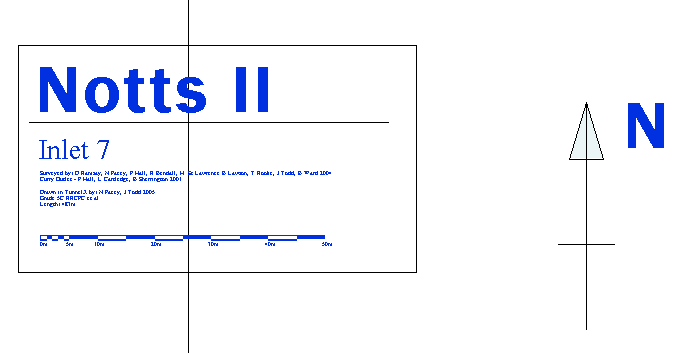
- Enter the text, scalebar and draw a North arrow.
Here is my title frame sketch:
|
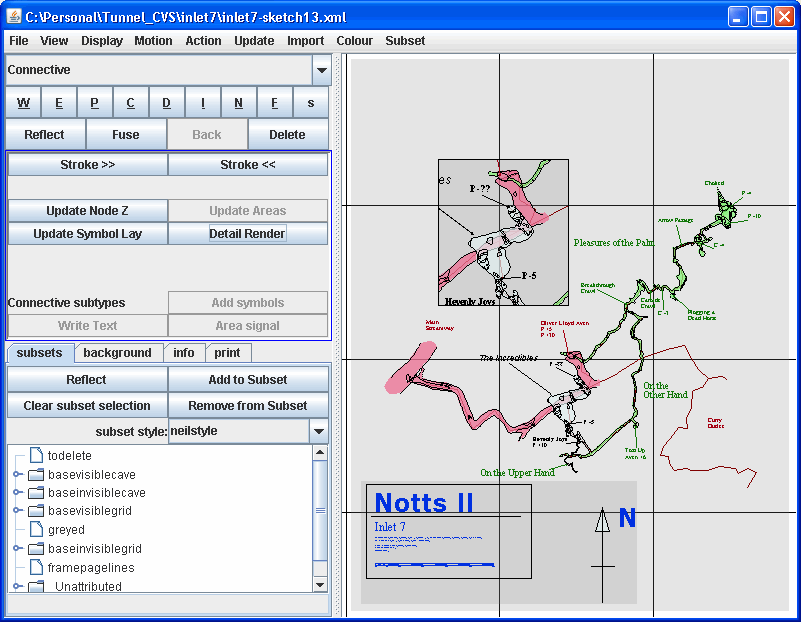
- Now reopen the presentation sketch and draw a new rectangle using invisible lines.
- Add a connective line from the corner of the rectangle and set the area signal to 'frame'.
- Switch to the mainbox window and click on the sketch containing your title box (just click once to select the line).
- Back in the sketch window click on the sketch, style, scale, X-translate and Y-translate buttons in that order.
You should now have the title box sketch showing in the new rectangle like this:
|
We are now nearly ready to print our page. But first we need to add all our frames into the subset for the A3 page frame.
- Click on the 'Subsets' tab in the sketch window, and scroll down the subsets list to find the 'Unattributed' group.
- Open this subset group and you should see an entry for the A3 paper we imported.
- Select the A3 paper subset (the main A3 frame should be coloured green in the sketch window.
- Now select each of the smaller frames and their connective lines in turn, and click the 'Add to subset' button.
- All three frames should now show up coloured, as they are all included in the A3 paper subset.
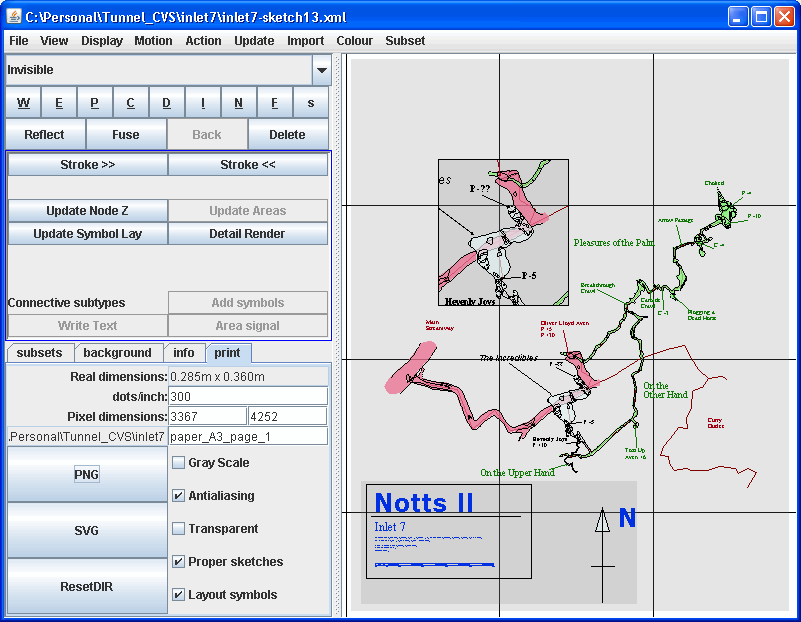
- Next select the 'Print' tab. You should see the A3 paper subset name in the box below the pixel dimensions boxes.
- Change the dots/inch value to 300 (for printing a high quality A3 page) and hit the 'Enter' key to confirm the change. You should see the pixel dimensions values updated to show the size of the bitmap which will be generated.
- Tick the 'Proper sketches' and 'Layout symbols' checkboxes. These will force Tunnel to perform an 'Update Everything' on all the sketches included in the presentation sketch when we output the bitmap.
- Finally click on the 'PNG' button to create a bitmap file for the A3 page.
- Look at the command log window while the bitmap is generated, to check that the symbol layout is being done.
|
You should now have a bitmap file of your presentation sketch suitable for printing onto an A3 page.
Images
If you have Positioned an image in the background then clicking the command Action | Frame Image will copy it into the frame at the position it's located and it will be rendered in place of a sketch. This will allow you to include photographs or thumb-nails in the final poster for your survey.
Vector output
There is an Output SVG option which produces an ssvg.svg file in the tunnel directory and lacks a user interface. It's a partial feature which has been through stages of development and at the moment is half-broken, although with some editing of the resulting file it is often possible to make it work.
If you have a bitmap image, there is an online service at the webpage vectormagic.stanford.edu. They appear to have no policy for open sourcing their work and are probably using it to harvest examples for the purposes of development of a product they hope to make money out of later, so they're not worthy of your support, but it's there if you want it.
Navigation
- Next Quick Controls
- Up Tutorial
- Previous Subsets and styles
