A walk through tunnel - Loading the data
From Fs_wiki
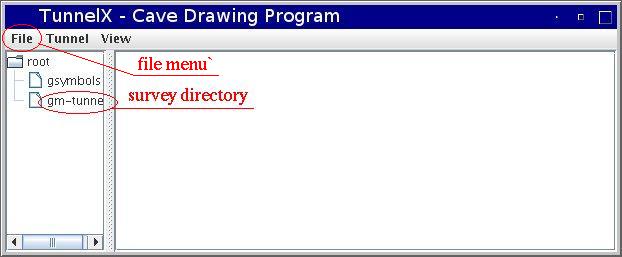
Tunnel "MainBox" window has a menubar and two sections underneath.
The menubar contains three menus:
- File, with submenus "New", "Open XML dir", "Open svx", "Refresh", "Set XML dir", "Save XML dir", and "Exit";
- Tunnel, with submenus "Wireframe", "Sketch", and "New sketch";
- View, with submenus "Cave Below" and "Whole Cave".
Working with directories
Tunnel works with directories. It is important to keep this in mind when using Tunnel. You should organize your data in a hierarchical directory tree, where the leaves contain survex data and scanned images, and represent pieces of cave, while an upper node aggregates the nodes under it in a larger map of the cave.
For this chapter it is enough to work with a single directory. Create a directory and put your survex and image files there. We use the directory "gm-tunnel" and put the files gm0.svx and gm0.gif there.
The left section of Tunnel MainBox window contains the tree of open directories. By default, at startup, Tunnel loads the data in its "gsymbols" subdirectory. This directory contains the symbols used in the cave drawing. If you want to use a new symbol, you need to create it and add it to the directory. The right section contains the list of files, with the full pathname (to avoid ambiguities about which file is being used). Initially it is empty because no directory is open.
Now click "File | Open XML dir" and select your directory. As we said before Tunnel works with directories, not with single files. So you must select and open a directory. Move down in the directory tree by double-clicking on the directory. Move up with the "Up" button (the leftmost one), or with the drop-down list. Click on a directory to select it. Finally click the "OK" button to confirm. The directory will appear in the left section of the MainBox window, as in the picture below. Notice that neither the "gsymbols" directory nor the data directory "gm-tunnel" is open: the right section of the window is still empty.
Working with svx files
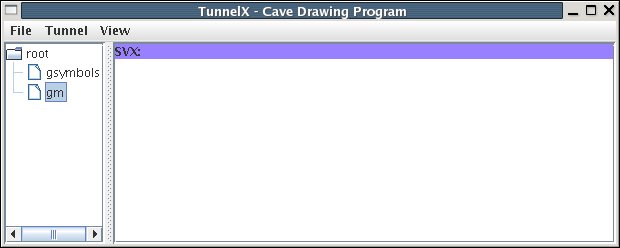
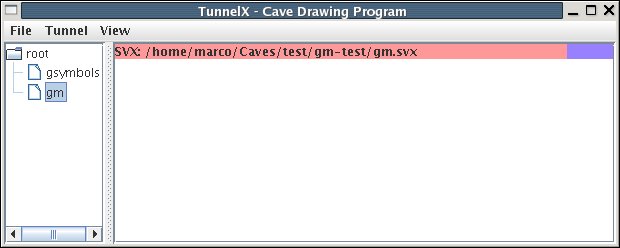
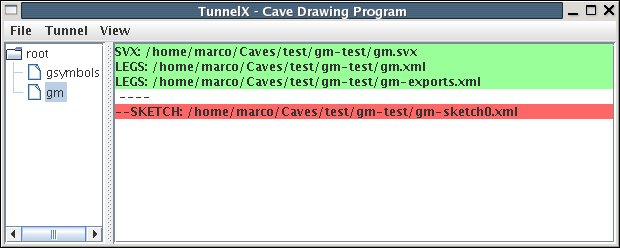
You can also start opening a survex svx file. Click on the menu "File | Open svx ..." and browse through the filesystem to the file you want to open. In our example we have put a copy of the file "gm0.svx" in the directory "gm-test" and renamed "gm.svx". After you have loaded the file, an entry with the name of the file without the svx extension appears in the directory tree on the left section. Click on it to open its content in the right section of the MainBox window. The directory entry will be highlighted (grey) to show that it has been opened, and an empty violet "SVX" line will appear in the right section. It is violet to remind you that you need to set the XML directory for this survey. Click on the menu "File | Set XML dir". Select an existing directory or create and select one. At this point, the name of the svx datafile will appear in the "SVX" line. It is red, because you need to save the XML directory. To do this click on the menu "File | Save XML dir". This will turn the svx file green.
When you open a new empty sketch do create a drawing for this survey Tunnel creates two other files. Both are of the type "LEG" and green (as they are up to date). They are actually XML files. One is for the exported data (stations), the other contains the survey data inferred from the svx file. They are named after the survex data file. The first one with the suffix "-exports" and extension ".xml". The second with the extension ".xml".
Other survey data formats
Tunnel can import files produced with Toporobot (extension ".top"), and with Wall (extension ".prj") \bib{Tu06a}. If you have your survey data processed with another program, you can convert them to a format handled by Tunnel using Rosetta Stal {Tu06c} (Windows only).


