This is NOT a tutorial. This is a set of reminders for people who already know all this stuff.
Since 2019 all use of version control software requires that you have key-pair setup already set up before any of this will work on your own machine.
- check that you can get ssh working before trying to run git too
If you can get to the expo laptop try these commands on that first as the key exchange has already been done. If the key exchnage has not been done then none of this will work.
You can read or clone these repos without any control, but to write ("push") to them you will need to use ssh://expo@expo.survex.com and set up the key exchange.
NOTE: always use user 'expo' as the login user (ssh://expo@...) even though within git you will be identified by your own ssh key name.
Brendan wrote a guide to using git for expo on a Windows machine. It's worth reading: Idiots guide to accessing expo git.pdf.
Open a terminal in a new directory, e.g. /tmp/experiments/ in which you want to create the repo. It will automatically create a folder with the repo name e.g.'troggle' in that directory.
It's much neater to do git fetch; git rebase origin master than git pull; which is equivalent to git fetch; git merge when you have a local change and there are changes on the server. The rebase command gives a nice linear log rather than trivial merges.
See nice explanantion at Merging vs. Rebasing: "The git rebase command has a reputation for being magical Git voodoo that beginners should stay away from, but it can actually make life much easier for a team.."
In VS code there is a "Pull (rebase)" command accessed from the "Push, Pull" option in the pull-down menu "..." in the SOURCE CONTROL window. Use that instead of the "Pull" option which is more obvious.

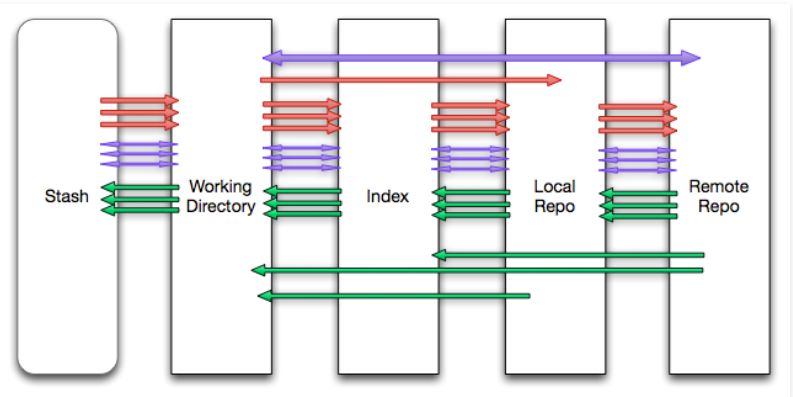
In Git, there are five places your source can exist:
Do not use the official "git for Windows" client software as it doesn't understand symlinks in the WSL filesystem (which is what we use on Windows). Use VS Code which understands WSL or a command line git in a WSL terminal window.
"Git is a 4 handle, dual boiler espresso machine – when all you need is instant."
Once you've downloaded and installed a git client, the first step is to create what is called a checkout of the data management system. This creates a copy on your machine which you can edit to your heart's content. The command to initially check out ('clone') the entire expo data management system is:
git clone ssh://expo@expo.survex.com/~/expoweb
for subsequent updates
git update
will generally do the trick.
After you've made a change, commit it to you local copy with:
git commit (you can specify filenames to be specific)
The first time you do this on a Windows machine it will probably not work as it does not recognise the server key exchange. Fix this by running putty (downloading it from https://www.chiark.greenend.org.uk/~sgtatham/putty/), and connecting to the server 'expo@expo.survex.com' (on port 22). Confirm that this is the right server. If you succeed in getting a shell prompt then ssh connection are working and git should be able to clone the repo, and send changes back.
![]()
For more detailed instructions on making Pageant work see the section in the middle of the Filezilla instructions where it describes how to configure Pageant.